

I needed to remove my instrument panel tonight to fix a crack in the dashboard surround so thought it best to take some photos of how to remove the instruments - handy if you want to replace any dash bulbs or install chrome dial rings etc.
First thing to do is disconnect the battery, negative first followed by the positive connection then wait 10 minutes. This discharges the airbag circuit and prevents it from being activated.
Next open the fuse box cover under the steering column and remove the 3 screws from the steering column cover.
![Image]()
Next unclip the 2 halves of the column cover and remove.
![Image]()
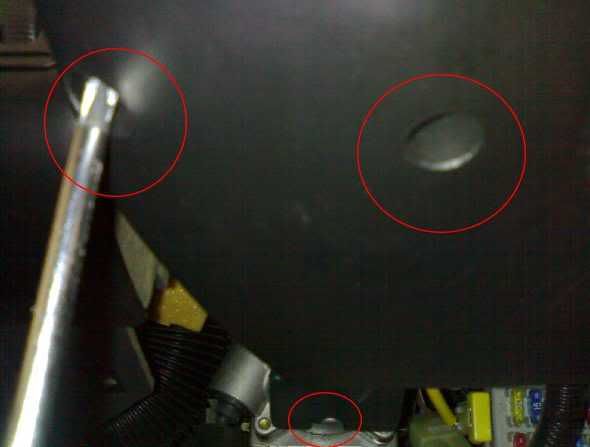
Now remove the 2 bottom screws and 2 top screws that hold the instrument suround panel in place
![Image]()
![Image]()
![Image]()
http://i143.photobucket.com/albums/r159/MantamadGTE/MGF INSTRUMENT PANEL/panel5.jpg
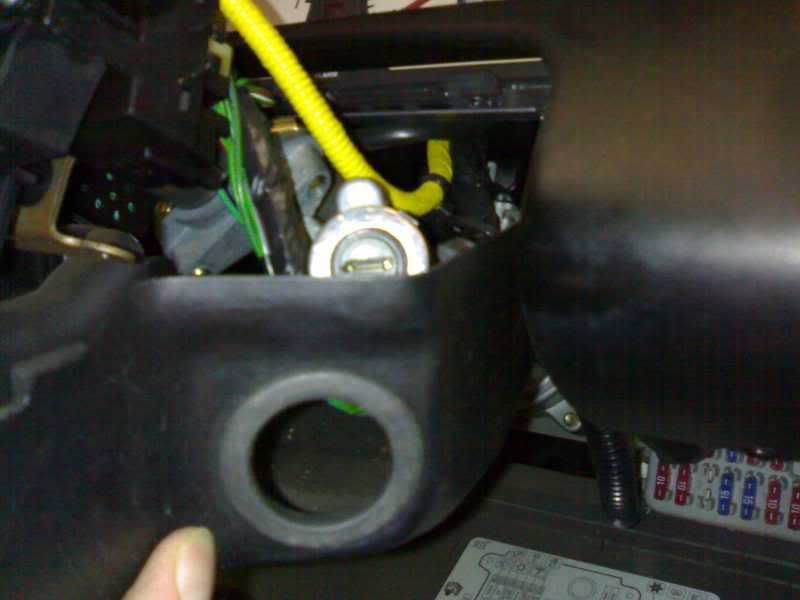
lift the surround away after disconnecting the instrument light dimmer, later models will have the door mirror adjust switch to disconnect as well -
![Image]()
Now remove the 4 screws that hold the instrument cluster in place
![Image]()
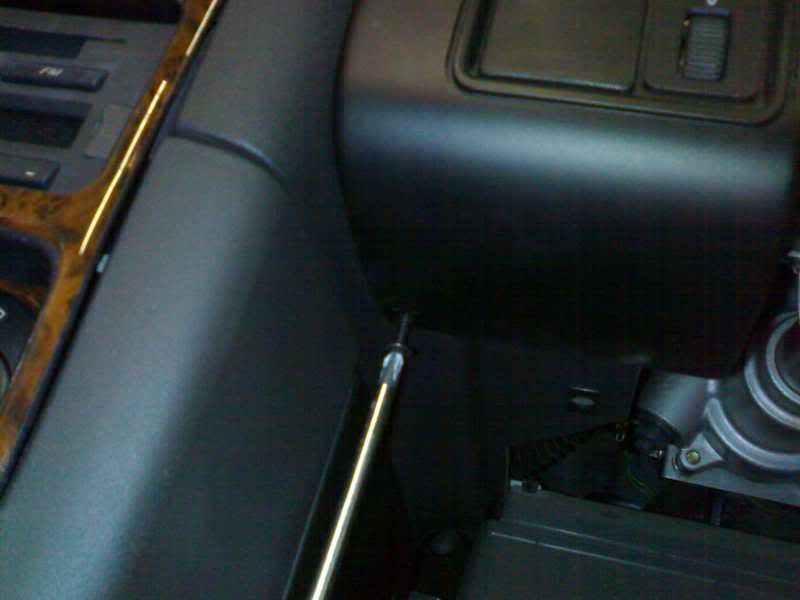
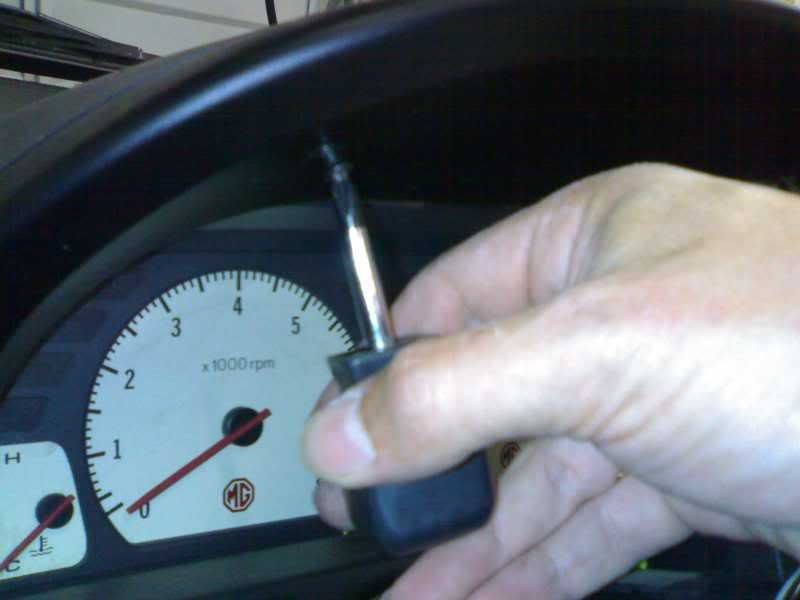
On Mk 1 models, disconnect the cable speedometer drive, I found it best to put my arm up from the fuse box area as shown below.
![Image]()
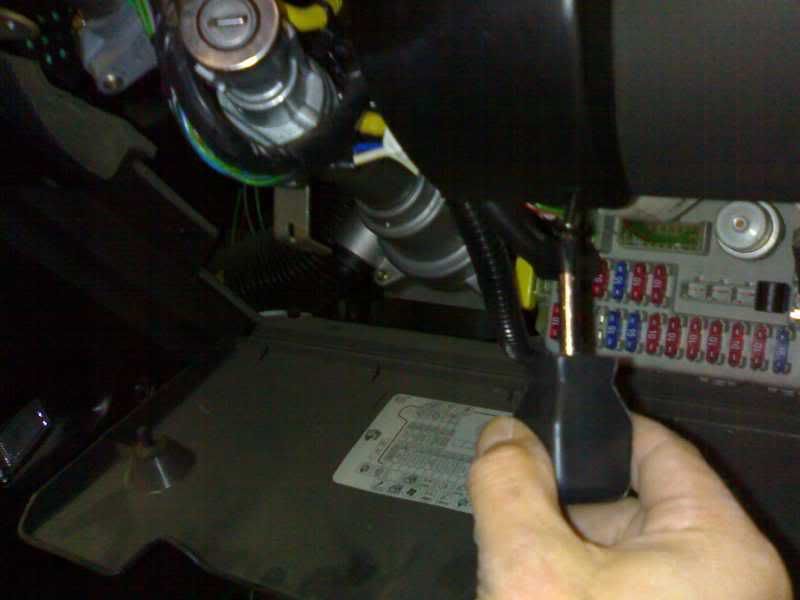
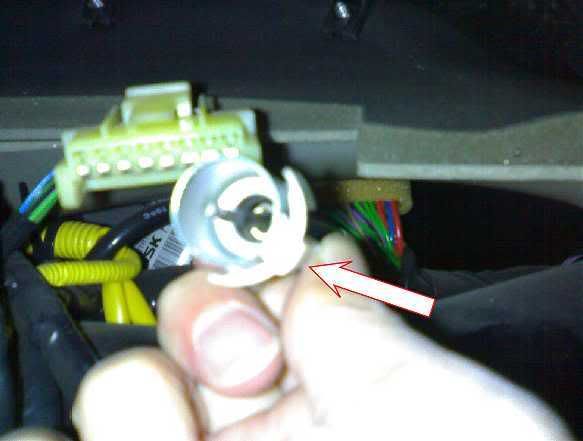
to release the cable, press on the plastic peg as shown and pull the cable out of the housing.
![Image]()
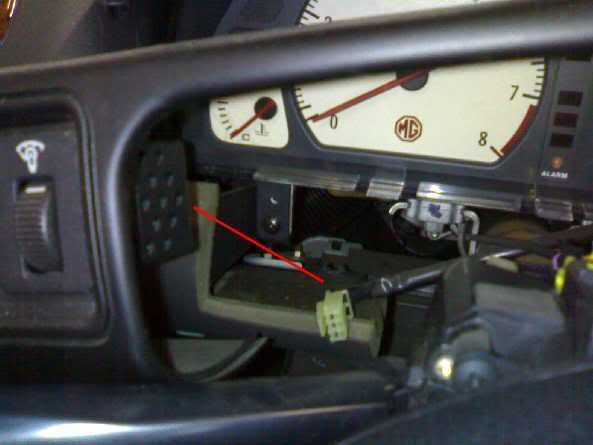
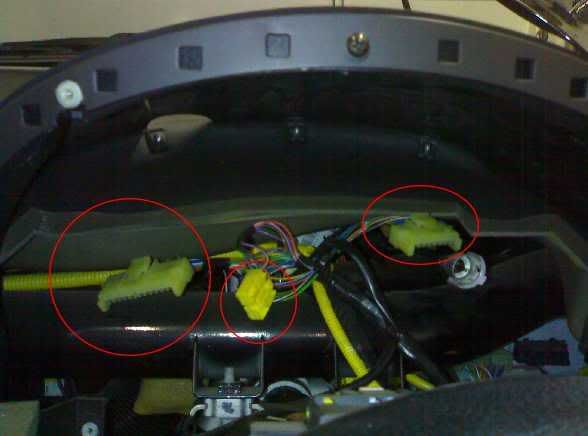
Before removing the cluster, you need to unplug the various connectors shown, later models will have an additional electronic speedo connection.
![Image]()
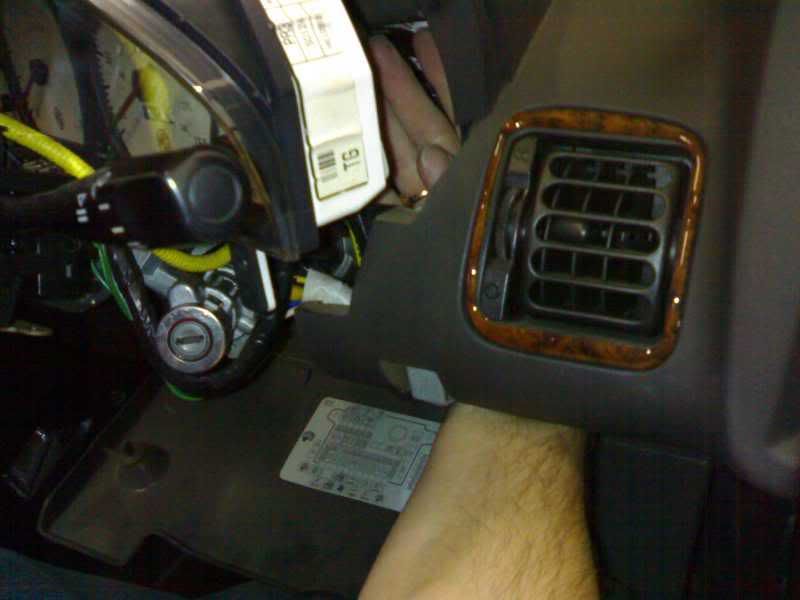
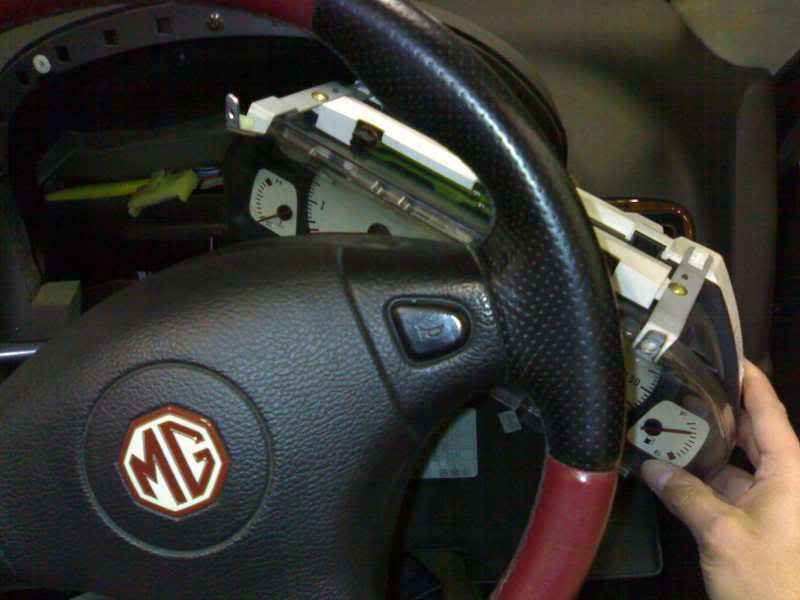
Now remove the instrument cluster, I found it easiest to remove from the right as shown. Be carefull that it does not catch on the electrical connections on top of the steering wheel column.
![Image]()
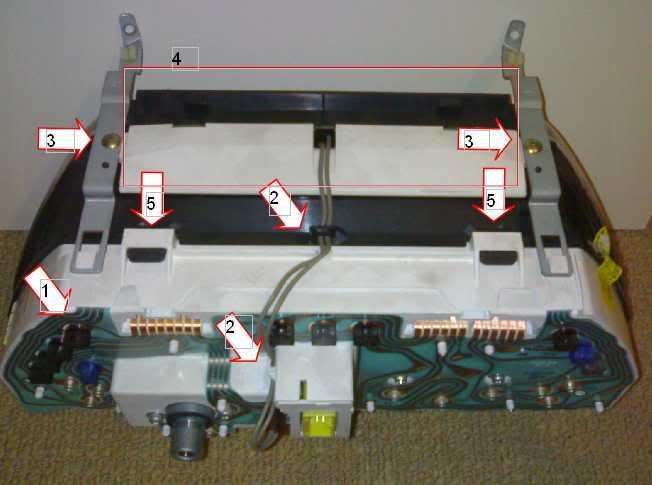
Now you can replace the bulbs by twisting the bulb holders out of the cluster as numbered (1)
If you want to gain access to the front of the dials, proceed to unclip the wire from the lighting pod at points (2) then unscrew to remove clips (3) and lift the lighting pod (4) away.
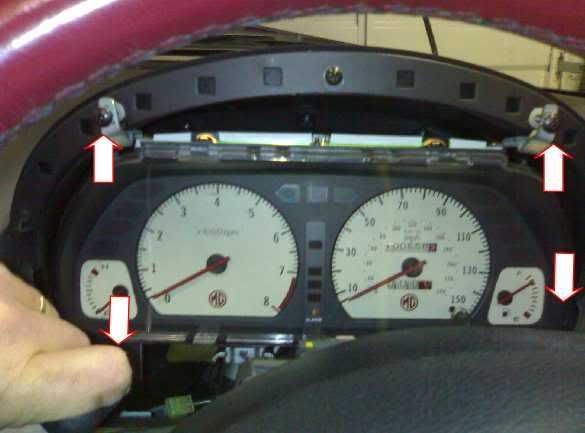
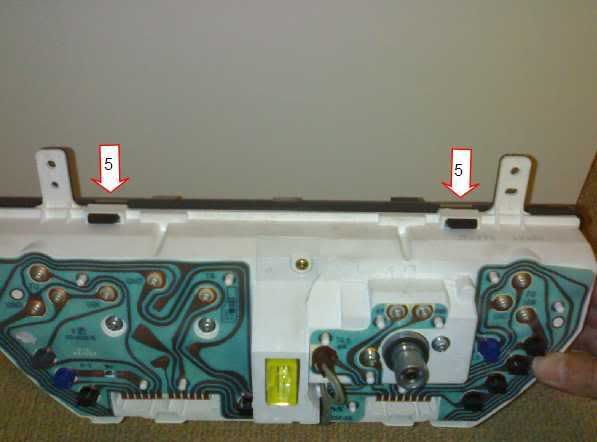
To remove the instrument 'glass' unclip the 2 clips (5)
![Image]()
Then turn the instruments over to release a further 2 clips (5), the glass now lifts off.
![Image]()
As usual, reverse procedure to refit.
The speedo drive cable needs to be lined up properly to click in place, just turn the cable with your fingers or pliers to get it in alignment with the square drive on the back of the speedo.
First thing to do is disconnect the battery, negative first followed by the positive connection then wait 10 minutes. This discharges the airbag circuit and prevents it from being activated.
Next open the fuse box cover under the steering column and remove the 3 screws from the steering column cover.
Next unclip the 2 halves of the column cover and remove.
Now remove the 2 bottom screws and 2 top screws that hold the instrument suround panel in place
lift the surround away after disconnecting the instrument light dimmer, later models will have the door mirror adjust switch to disconnect as well -
Now remove the 4 screws that hold the instrument cluster in place
On Mk 1 models, disconnect the cable speedometer drive, I found it best to put my arm up from the fuse box area as shown below.
to release the cable, press on the plastic peg as shown and pull the cable out of the housing.
Before removing the cluster, you need to unplug the various connectors shown, later models will have an additional electronic speedo connection.
Now remove the instrument cluster, I found it easiest to remove from the right as shown. Be carefull that it does not catch on the electrical connections on top of the steering wheel column.
Now you can replace the bulbs by twisting the bulb holders out of the cluster as numbered (1)
If you want to gain access to the front of the dials, proceed to unclip the wire from the lighting pod at points (2) then unscrew to remove clips (3) and lift the lighting pod (4) away.
To remove the instrument 'glass' unclip the 2 clips (5)
Then turn the instruments over to release a further 2 clips (5), the glass now lifts off.
As usual, reverse procedure to refit.
The speedo drive cable needs to be lined up properly to click in place, just turn the cable with your fingers or pliers to get it in alignment with the square drive on the back of the speedo.
")


