
Hello all. Just some quick pictures to give something back to the MG community as a small thank you for all you help, especially Stephan (Herbie) ")
Alright, I now have a new TF rack to fit to my 1999 MK1 F. These are my thoughts and solution. (I apologies for my english in advance, I hope you understand me despite typos and bad sentences. )
My car is a LHD car, but I think this is usefull info for my friends in the UK as well, just think " oposite". Will try to take into account that most of the members are from the UK and note this when I comment my pictures.
Note: If you have a TF and are doing a swap, follow the directions under, me having an F and installing a TF rack had some problems, more info will follow at the end.
PLEASE don't fiddle with you cars steering if your not at least 90% sure of what you are doing, and or have a friend/mechanic that can help.
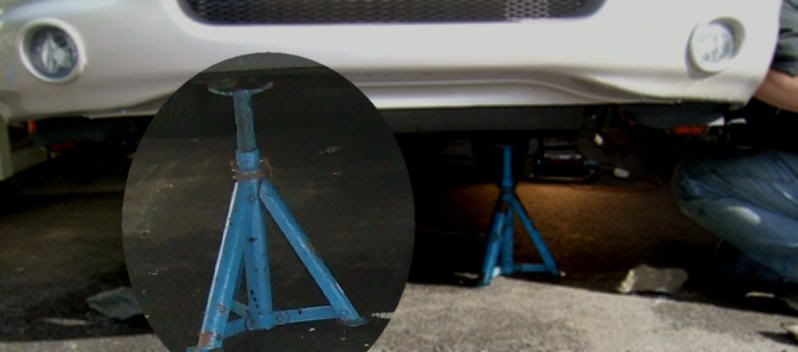
PLEASE use axelstands and secure your car!
You need to have a four wheel alignment done after this.
Tools needed:
Steelbrush
10/12/13/17 and 19 mm spanners.
WD40 or similar.
Some screwdrivers.
Something to measure with.
A piece of paper and a pen.
Treadlock/Locktite
Small hammer.
One good friend
Tea and or a couple of pints.
New trackrod ends. (Not needed really, but this would be a good time to change them.) Mine was new 9 month ago from MS, and they where in terrible shape..
Quick tip: lubricate the track rod ends a couple of days in advance to make it easyer to get off.
![Image]()
And again, secure your car!
![Image]()
All right, here we go:
Jack up your car, secure it and remove both front wheels. Remove spare wheel, tools and the large plastic cover under the bonnet.
Make sure your steering wheels is in normal "straight forward" position.
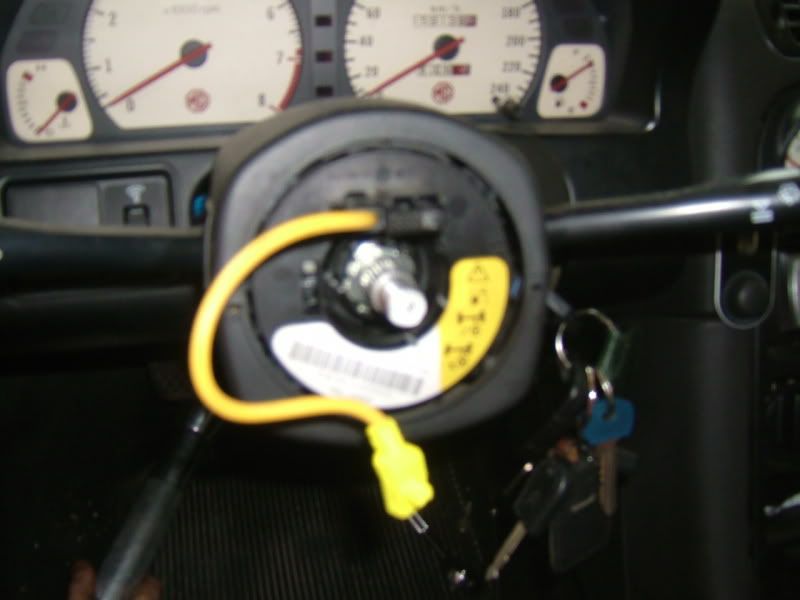
In the drivers footwell, peel back the carpet.
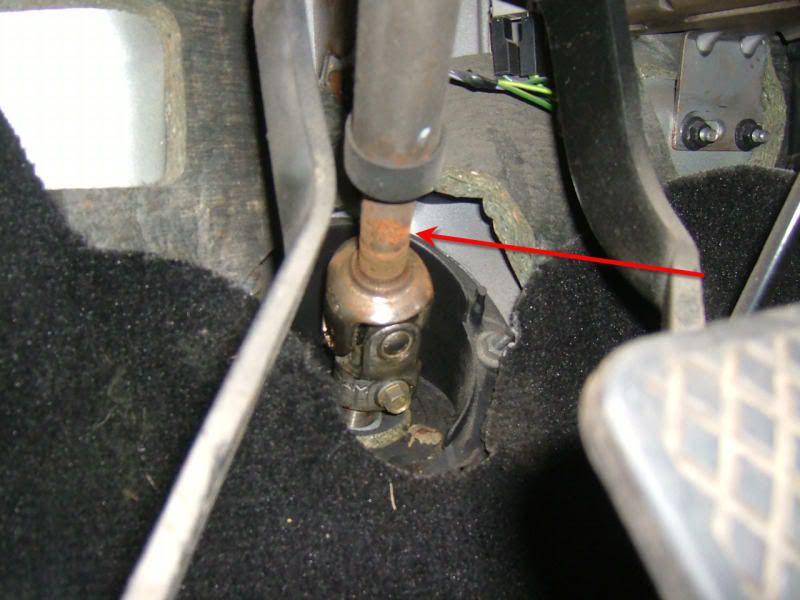
Quick tip: Lubricate the steering column(spelling?) with WD40 or similar.
![Image]()
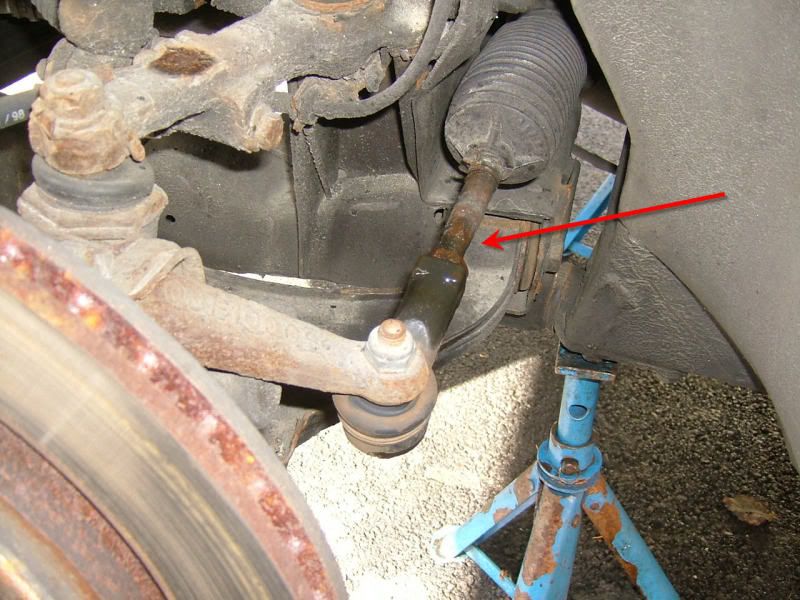
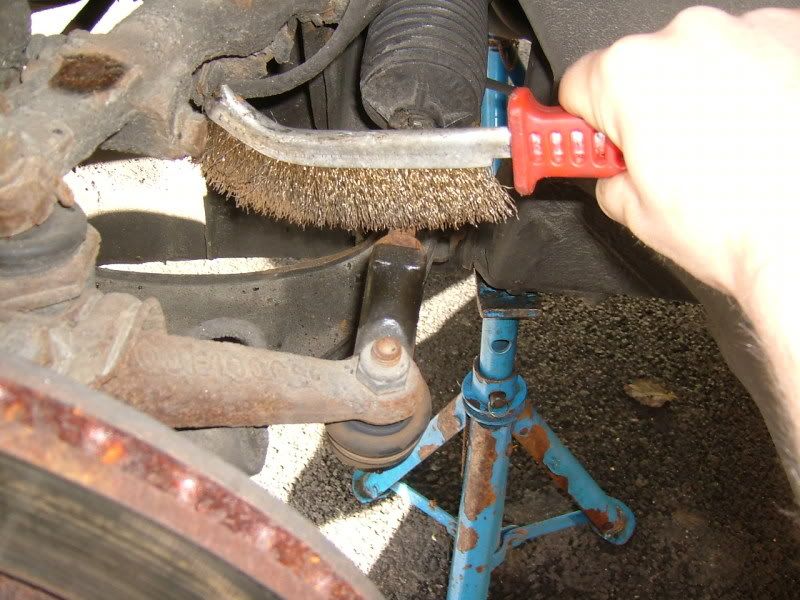
Brush off any rust and dirt from the trackrod ends, lubricate again.
![Image]()
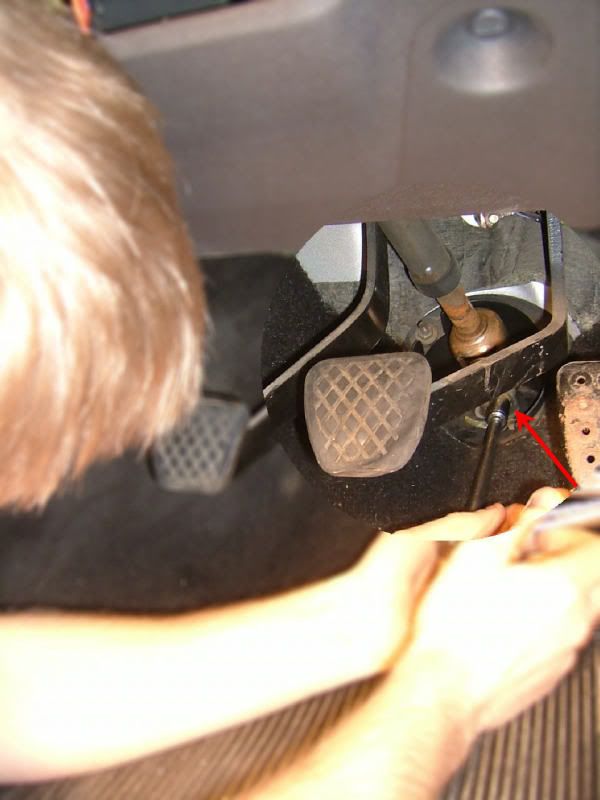
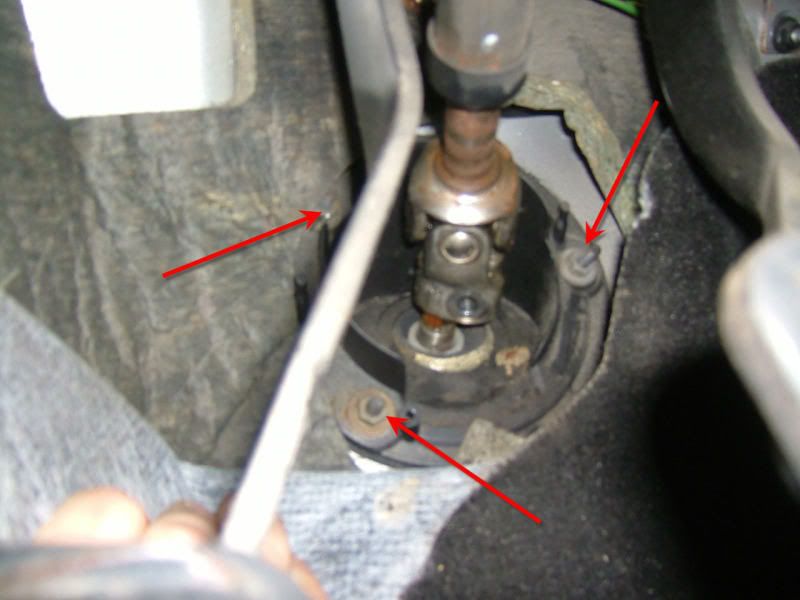
Remove the bolt using a 10mm spanner or similar.
![Image]()
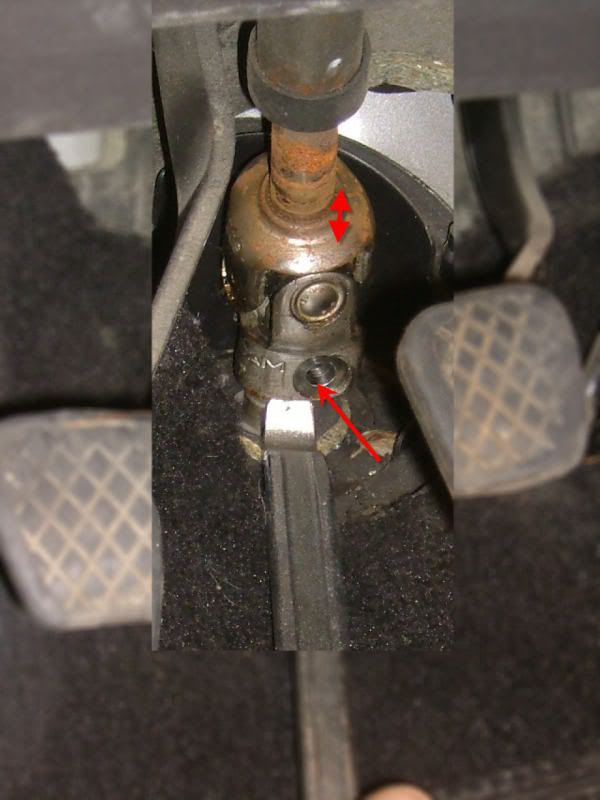
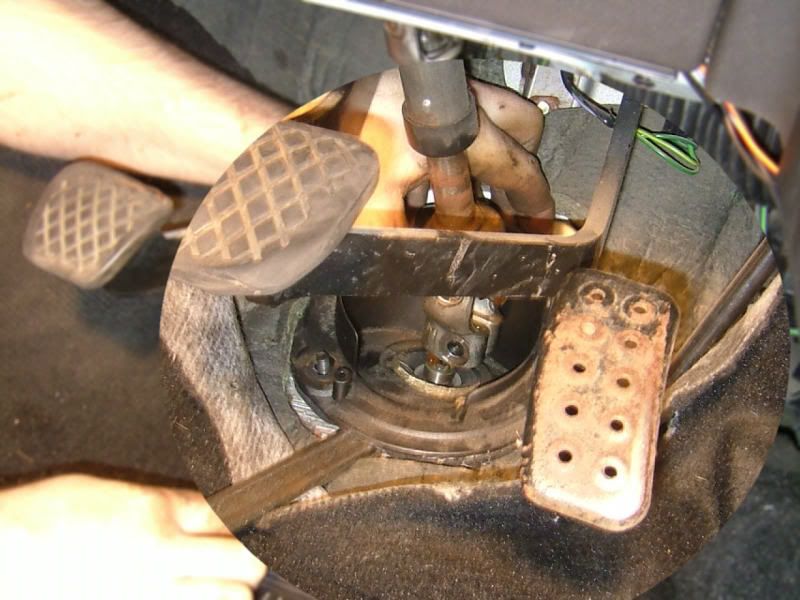
The steering column itself is "telescopic", it can move up and down in case of an accident. Use A large scredriver or similar to lift it away from the steering rack.
![Image]()
Measure the threads to get a app. distance of how much the trackrod ends needs to be screwed in. This does not mean that a 4 wheel aligment is neccasary, but at least you will get there. Write this down on a piece of paper, you guys know we tend to forget things.
![Image]()
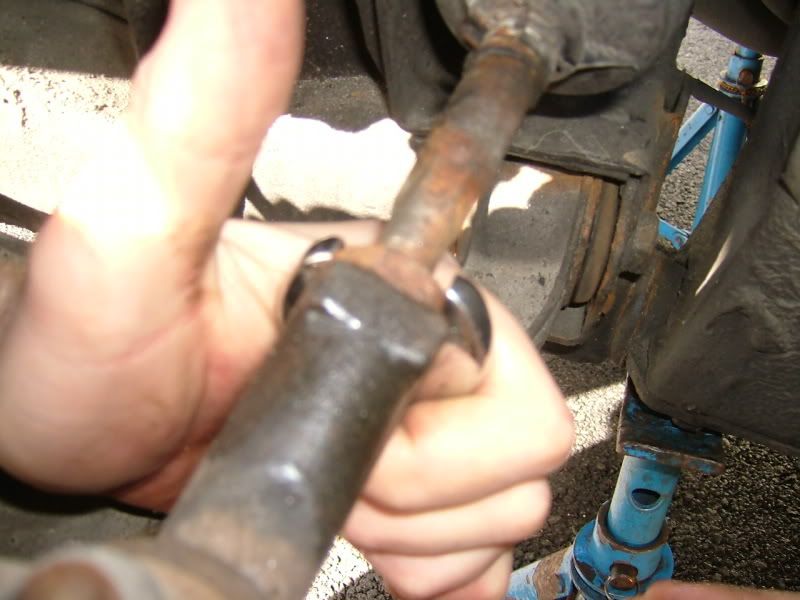
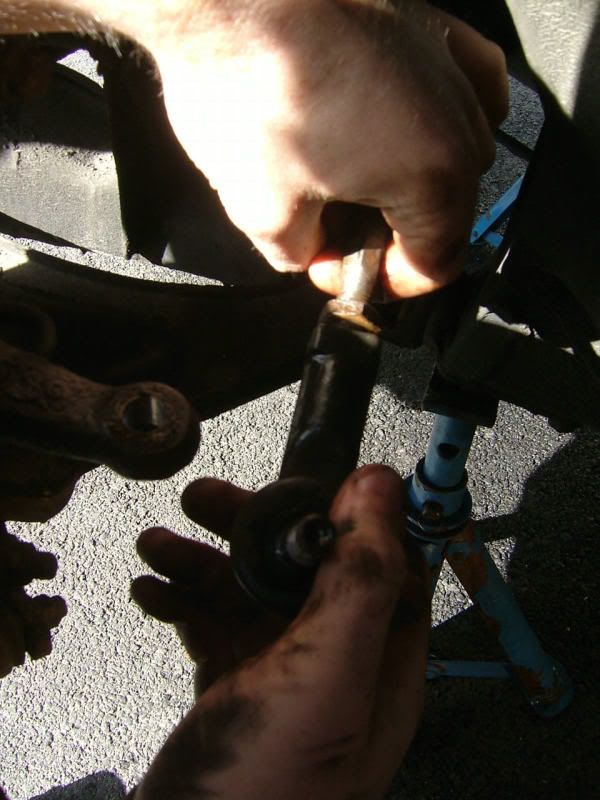
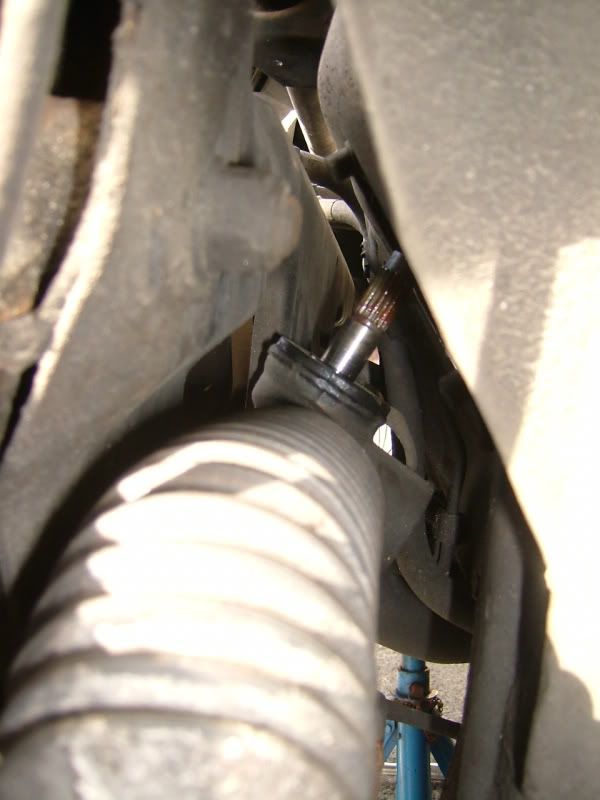
Unscrew the trackrod ends using a 19 mm spanner.
![Image]()
Unscrew the trackrod itself using a 17 mm spanner.
![Image]()
Tap it gently with a small hammer. DO NOT DAMAGE the rubber seal.
![Image]()
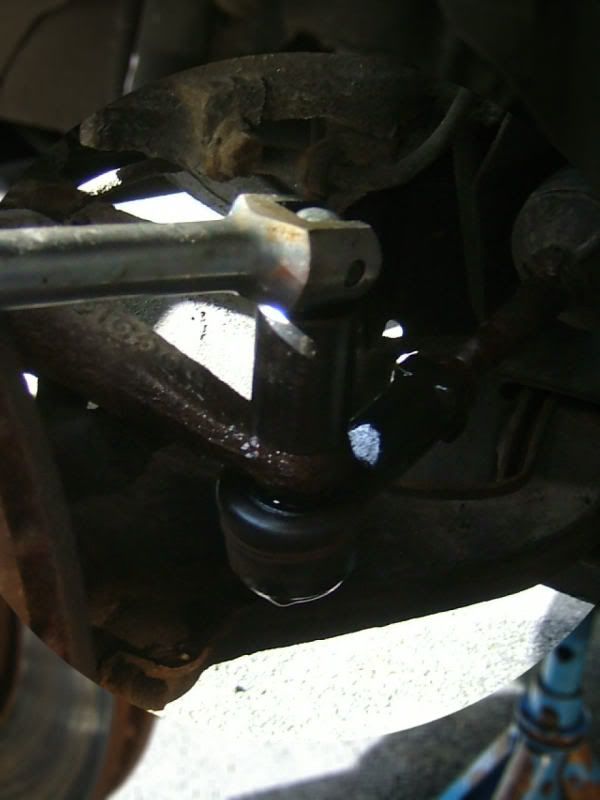
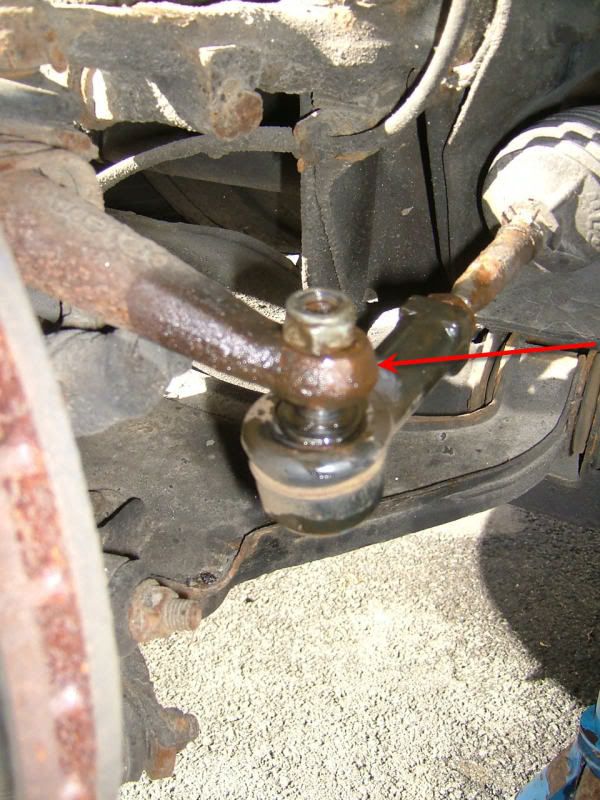
Remove nut and count the turns needed to screw the track rod out. Write this down on the same piece of paper. Repeat procedure on the other side.
![Image]()
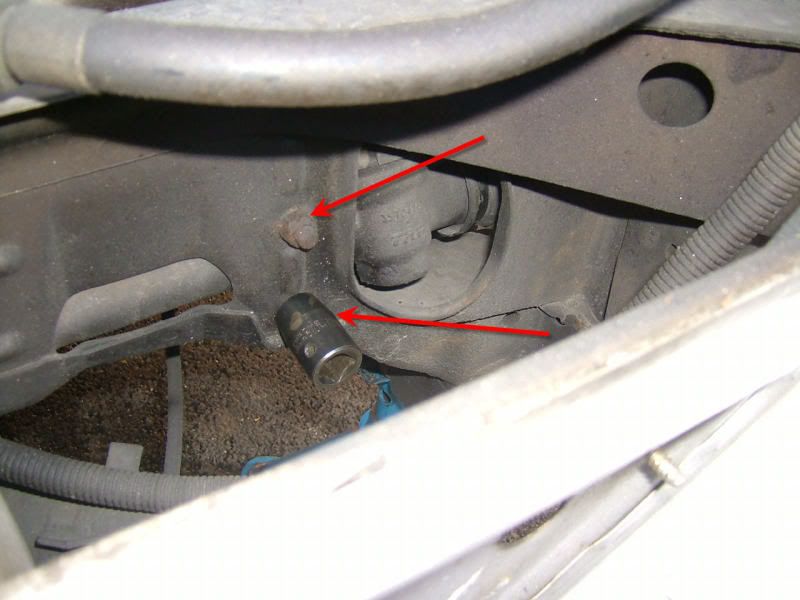
Under the bonnet, locate the two 13 mm bolts that clamp the steering rack to the body and unscrew them. Looking down that would be on the left hand side for you UK guys, and on the right hand side in the pictures (LHD).
![Image]()
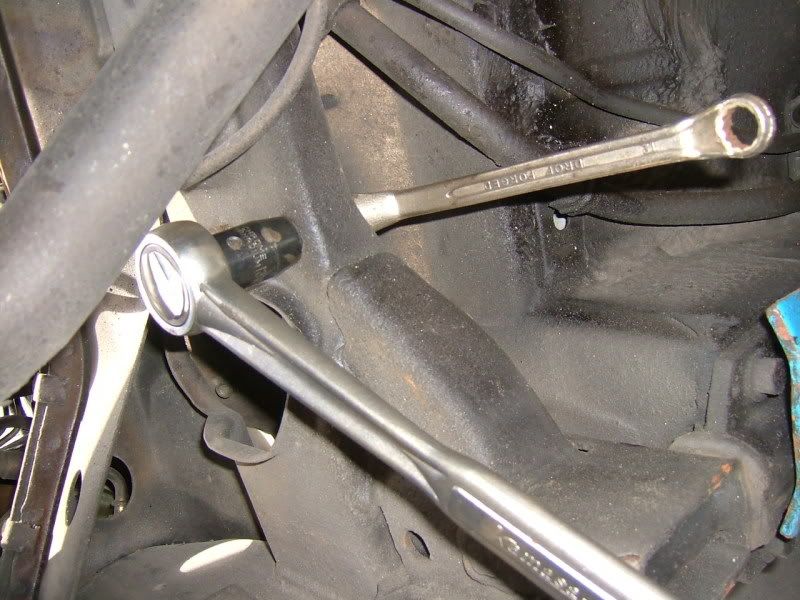
On my left hand side looking down in the bonnet, use a 13mm spanner to hold the nut and another 13 mm spanner to unscrew the bolt. As before, this would be on the right hand side for you UK boys and girls.
![Image]()
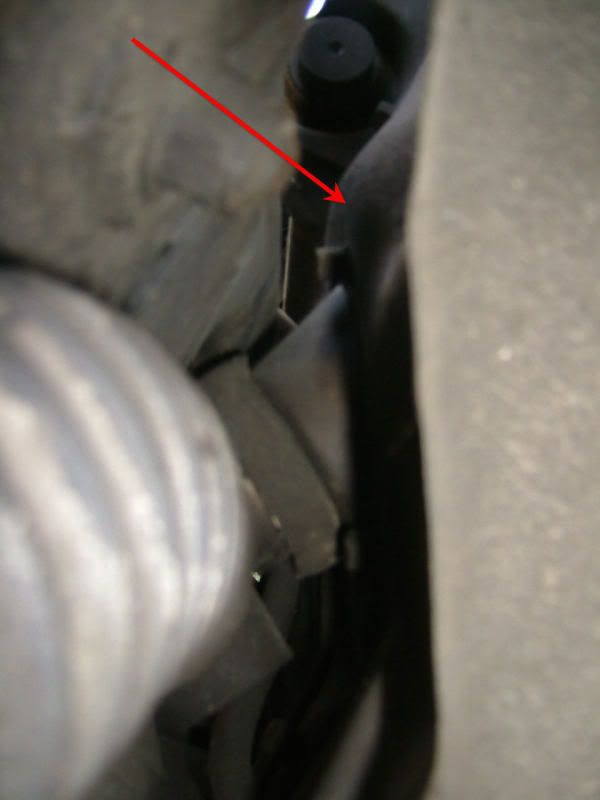
There is a plastic cover, perhaps for sound isolation sorrounding the steering rack.
![Image]()
Remove 3 10mm bolts and pull towards you into the drivers footwell.
![Image]()
![Image]()
The steering rack should now be free from the steering column. Have a friend help you remove it, pull it towards you. From the left hand side of the car (LHD) or from the right hand side (RHD).
![Image]()
Insert the new one.
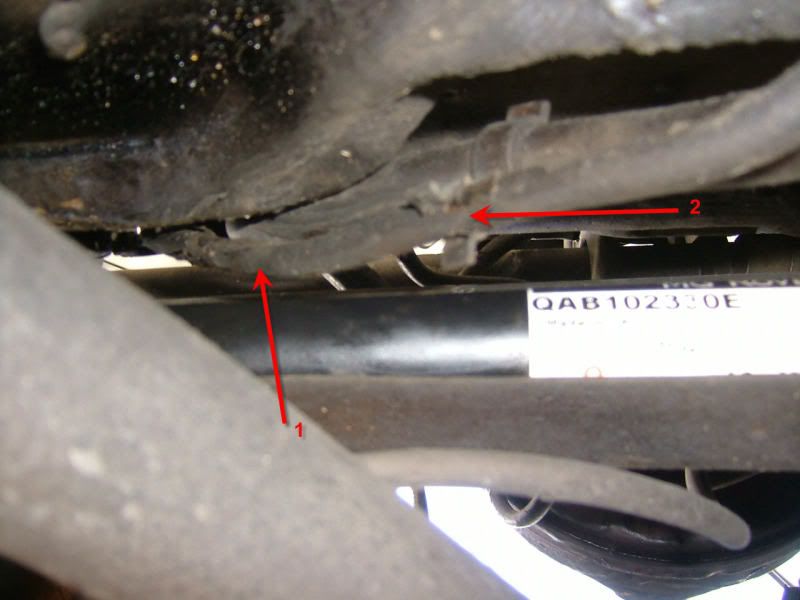
Please note that I had some trouble getting pass this cable (1), unclip it (2) and have a mate help you with this part of the job.
![Image]()
Alright, I now have a new TF rack to fit to my 1999 MK1 F. These are my thoughts and solution. (I apologies for my english in advance, I hope you understand me despite typos and bad sentences.
) My car is a LHD car, but I think this is usefull info for my friends in the UK as well, just think " oposite". Will try to take into account that most of the members are from the UK and note this when I comment my pictures.
Note: If you have a TF and are doing a swap, follow the directions under, me having an F and installing a TF rack had some problems, more info will follow at the end.
PLEASE don't fiddle with you cars steering if your not at least 90% sure of what you are doing, and or have a friend/mechanic that can help.
PLEASE use axelstands and secure your car!
You need to have a four wheel alignment done after this.
Tools needed:
Steelbrush
10/12/13/17 and 19 mm spanners.
WD40 or similar.
Some screwdrivers.
Something to measure with.
A piece of paper and a pen.
Treadlock/Locktite
Small hammer.
One good friend
Tea and or a couple of pints.
New trackrod ends. (Not needed really, but this would be a good time to change them.) Mine was new 9 month ago from MS, and they where in terrible shape..
Quick tip: lubricate the track rod ends a couple of days in advance to make it easyer to get off.
And again, secure your car!
All right, here we go:
Jack up your car, secure it and remove both front wheels. Remove spare wheel, tools and the large plastic cover under the bonnet.
Make sure your steering wheels is in normal "straight forward" position.
In the drivers footwell, peel back the carpet.
Quick tip: Lubricate the steering column(spelling?) with WD40 or similar.
Brush off any rust and dirt from the trackrod ends, lubricate again.
Remove the bolt using a 10mm spanner or similar.
The steering column itself is "telescopic", it can move up and down in case of an accident. Use A large scredriver or similar to lift it away from the steering rack.
Measure the threads to get a app. distance of how much the trackrod ends needs to be screwed in. This does not mean that a 4 wheel aligment is neccasary, but at least you will get there.
Write this down on a piece of paper, you guys know we tend to forget things. 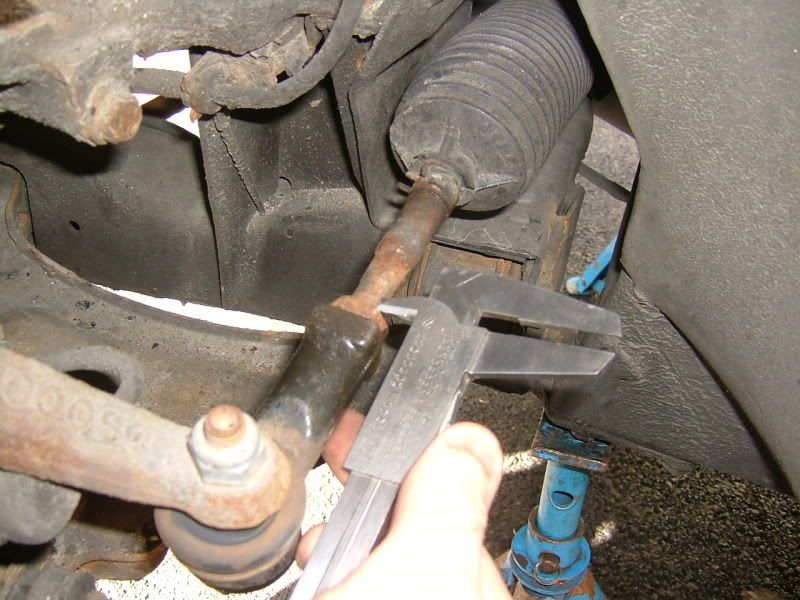
Unscrew the trackrod ends using a 19 mm spanner.
Unscrew the trackrod itself using a 17 mm spanner.
Tap it gently with a small hammer. DO NOT DAMAGE the rubber seal.
Remove nut and count the turns needed to screw the track rod out. Write this down on the same piece of paper. Repeat procedure on the other side.
Under the bonnet, locate the two 13 mm bolts that clamp the steering rack to the body and unscrew them. Looking down that would be on the left hand side for you UK guys, and on the right hand side in the pictures (LHD).
On my left hand side looking down in the bonnet, use a 13mm spanner to hold the nut and another 13 mm spanner to unscrew the bolt. As before, this would be on the right hand side for you UK boys and girls.
There is a plastic cover, perhaps for sound isolation sorrounding the steering rack.
Remove 3 10mm bolts and pull towards you into the drivers footwell.
The steering rack should now be free from the steering column. Have a friend help you remove it, pull it towards you. From the left hand side of the car (LHD) or from the right hand side (RHD).
Insert the new one.
Please note that I had some trouble getting pass this cable (1), unclip it (2) and have a mate help you with this part of the job.