

Well as i received some excellent guidance earlier on how i go about changing my rear lights as i couldnt find a guide, i figured i would take pictures while i changed mine so if anyone else needs to they can see how easy it is.
So here goes...
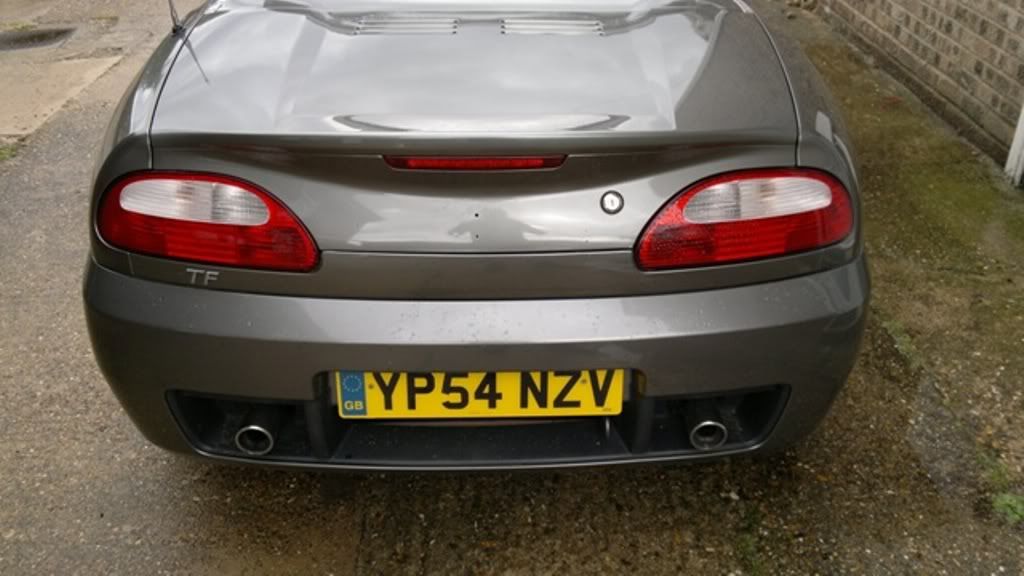
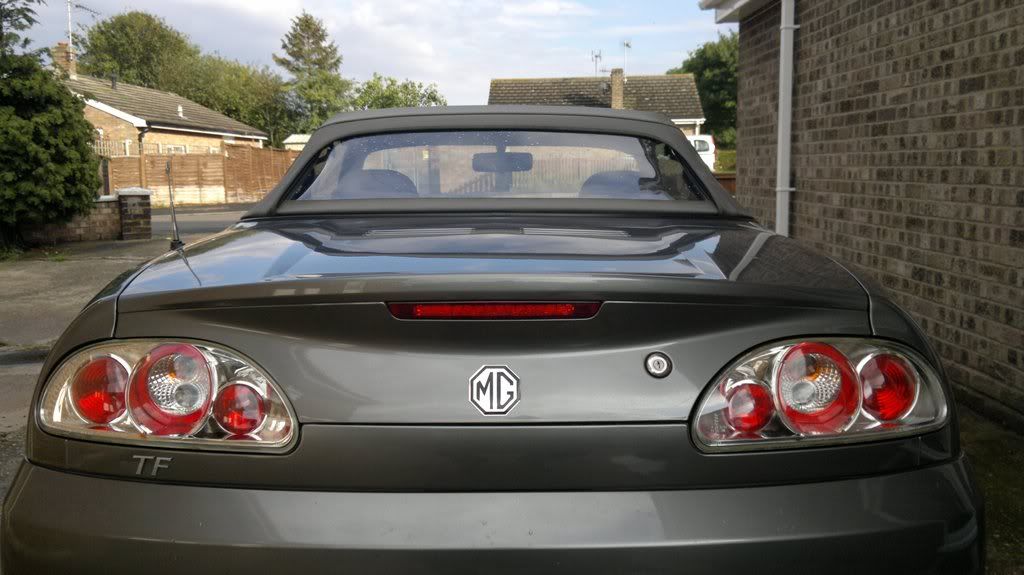
This is the back of my car (minus a badge)
![Image]()
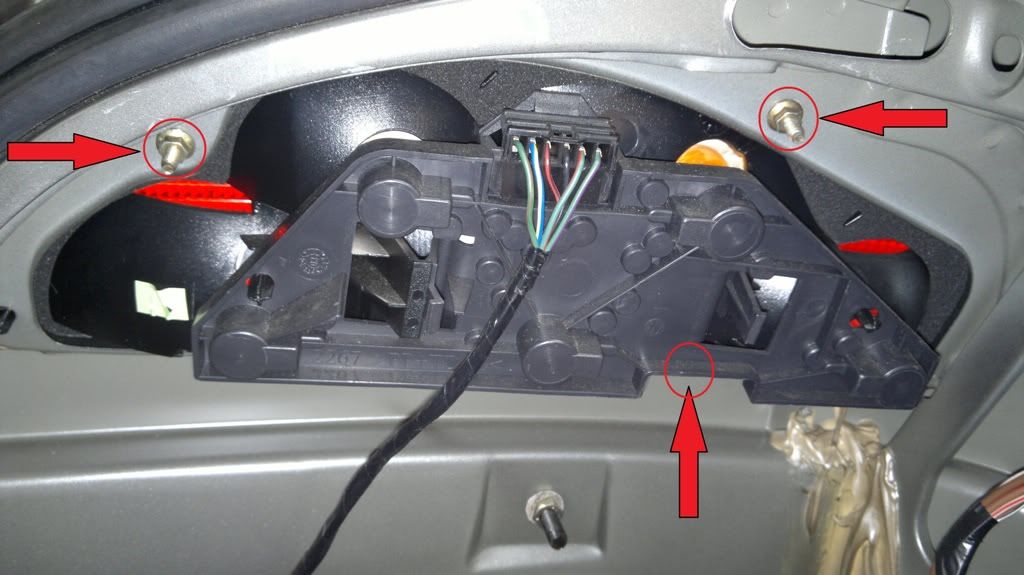
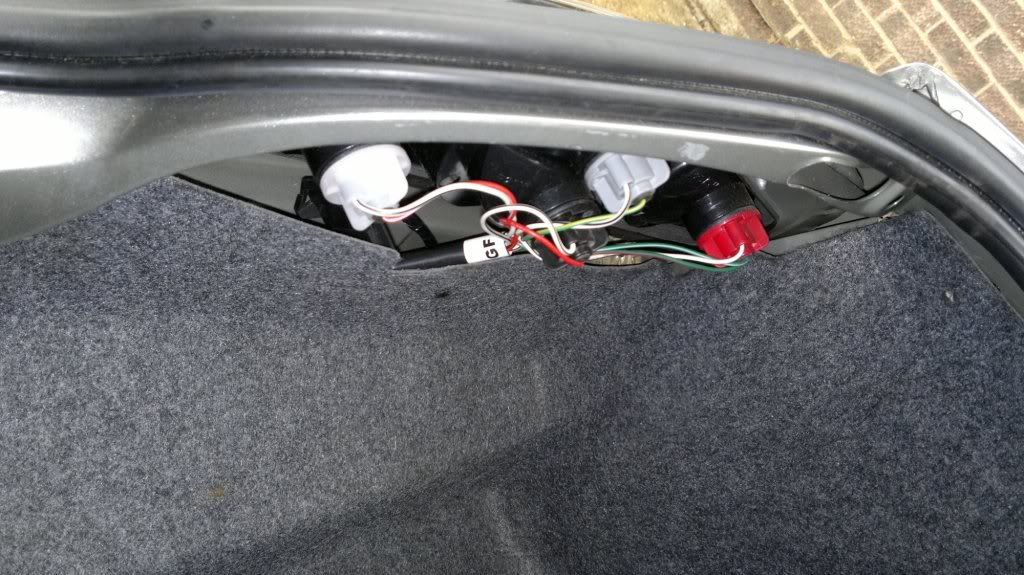
Open up the boot and pull back the carpet a little to give yourself a bit of room to work in. You now need to remove the 3 nuts highlighted on the photo below (this will release the light unit from the car). The 3rd nut is not visible on the photo but it is just behind the bit of plastic highlighted.
![Image]()
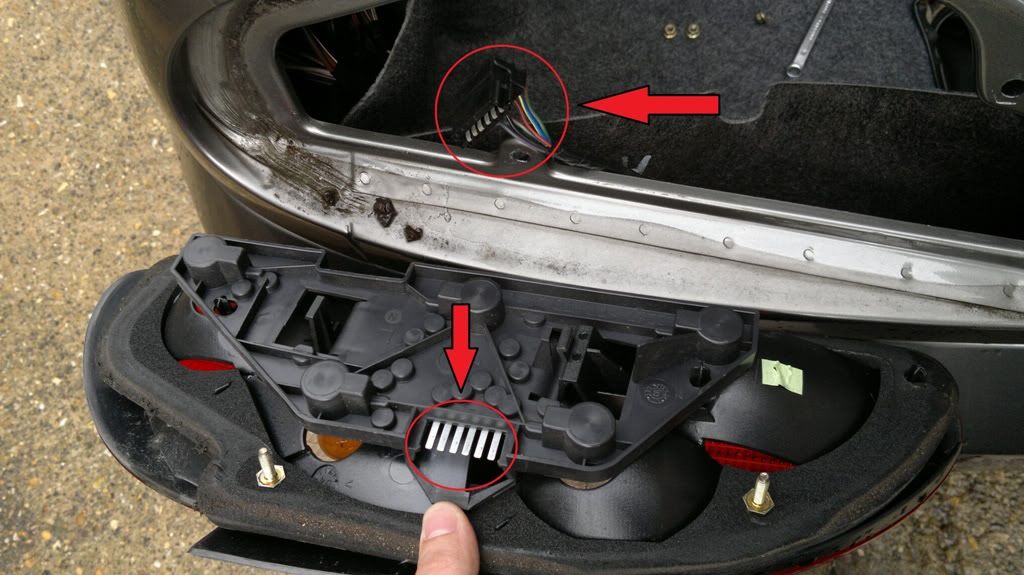
Once they are off, give the light unit a push from the back while holding the front to make sure it doesnt jump onto the floor. Then disconnect the plug highlighted on the next photo:
![Image]()
Once that is done the light unit is completely disconnected so you can grab your replacement light. Push the replacement back into the holes where the screws were previously (exactly where you took the previous light from). Once its nicely in place you can reconnect the wiring plug...
![Image]()
Now we are reconnected screw the 3 nuts we removed earlier back onto their new screws (which are in the new light unit) to hold it in place. These dont need to be over tight, just tight enough to hold it snug so theres no rattle, otherwise you can crack the plastic housing of the light unit.
You should now have something similar to this:
![Image]()
From the inside you should have something like this: (maybe you have tidier wires!)
![Image]()
Thats it the left light unit is now fully replaced so get cracking with the right unit which is identical to the left.
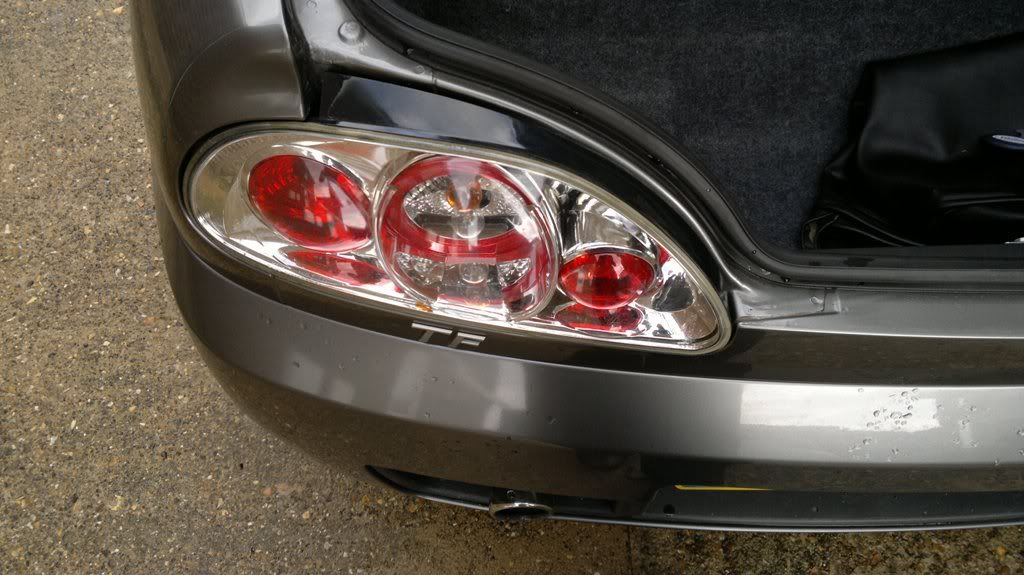
When you have finished you should end up with something like this:
![Image]()
You probably wont have a new badge when you finish your lights as i did that once i finished the lights!
Hope this is nice and clear and helps somebody in the future and gives a little something back for all the help i have been given so far :URGOD:
Cheers
Dan
So here goes...
This is the back of my car (minus a badge)
Open up the boot and pull back the carpet a little to give yourself a bit of room to work in. You now need to remove the 3 nuts highlighted on the photo below (this will release the light unit from the car). The 3rd nut is not visible on the photo but it is just behind the bit of plastic highlighted.
Once they are off, give the light unit a push from the back while holding the front to make sure it doesnt jump onto the floor. Then disconnect the plug highlighted on the next photo:
Once that is done the light unit is completely disconnected so you can grab your replacement light. Push the replacement back into the holes where the screws were previously (exactly where you took the previous light from). Once its nicely in place you can reconnect the wiring plug...

Now we are reconnected screw the 3 nuts we removed earlier back onto their new screws (which are in the new light unit) to hold it in place. These dont need to be over tight, just tight enough to hold it snug so theres no rattle, otherwise you can crack the plastic housing of the light unit.
You should now have something similar to this:
From the inside you should have something like this: (maybe you have tidier wires!)
Thats it the left light unit is now fully replaced so get cracking with the right unit which is identical to the left.
When you have finished you should end up with something like this:
You probably wont have a new badge when you finish your lights as i did that once i finished the lights!
Hope this is nice and clear and helps somebody in the future and gives a little something back for all the help i have been given so far :URGOD:
Cheers
Dan
")

-4N3G!~~_12.JPG)


