

Lowering guide with pics! UPDATE, PICS BACK!!!!
How to put lowering springs on a Bubble/25/ZR
If you wish to follow my guide I will not be held responsible if anything was to happen.....and please ensure you have the right tools and are confident in doing this work, the most dangerous part is the spring itself, when compressed it has serious force and can injure if it comes free when released.
Tools needed
Jack
Axle Stands
Ratchet/Spanner (12mm, 15mm)
Allen Keys
Spring Compressors
WD40 and a Breaker Bar can be useful
Starting with the rear
Jack the car up support on AXLE STANDS and remove the wheels
Open the boot and remove the carpet
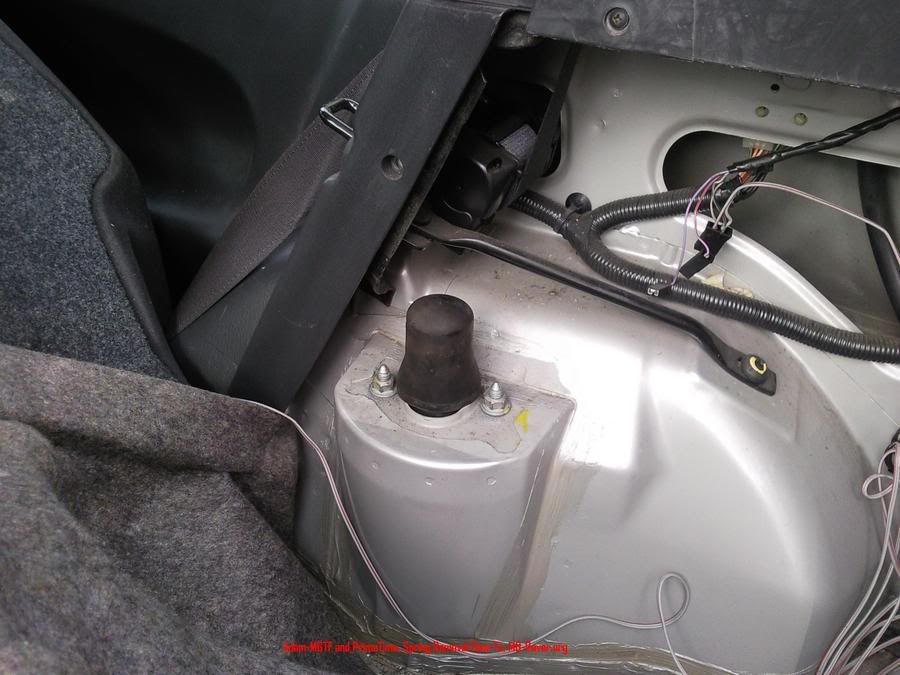
You should see this,
![Image]()
![Image]()
Remove the rubber grommet to reveal the top of the strut hub
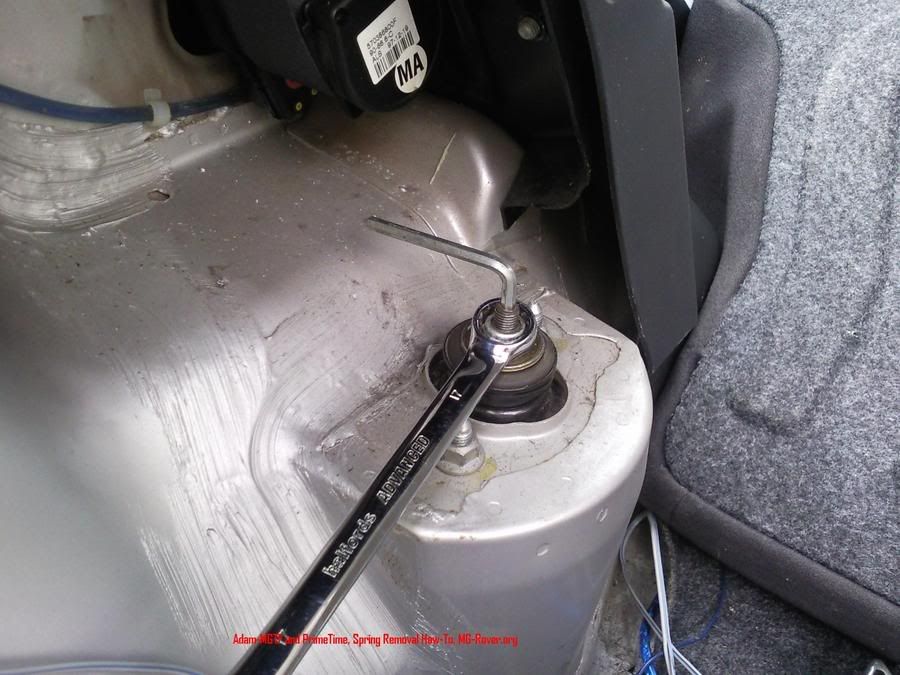
Loosen the Nylon Nut using an Allen Key and Spanner (two or three rotations)
![Image]()
![Image]()
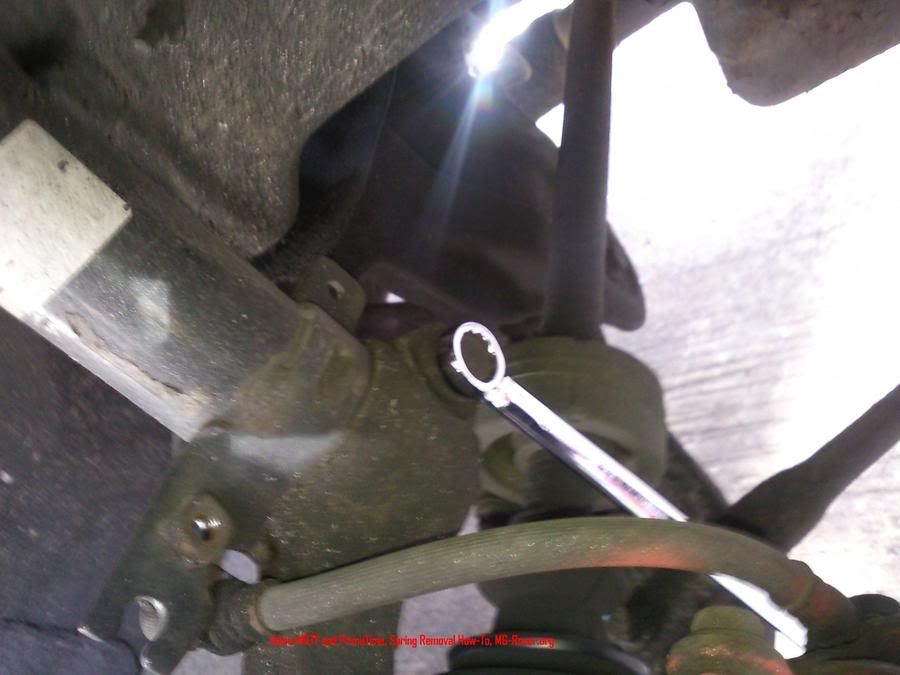
Loosen the top nuts using a ratchet
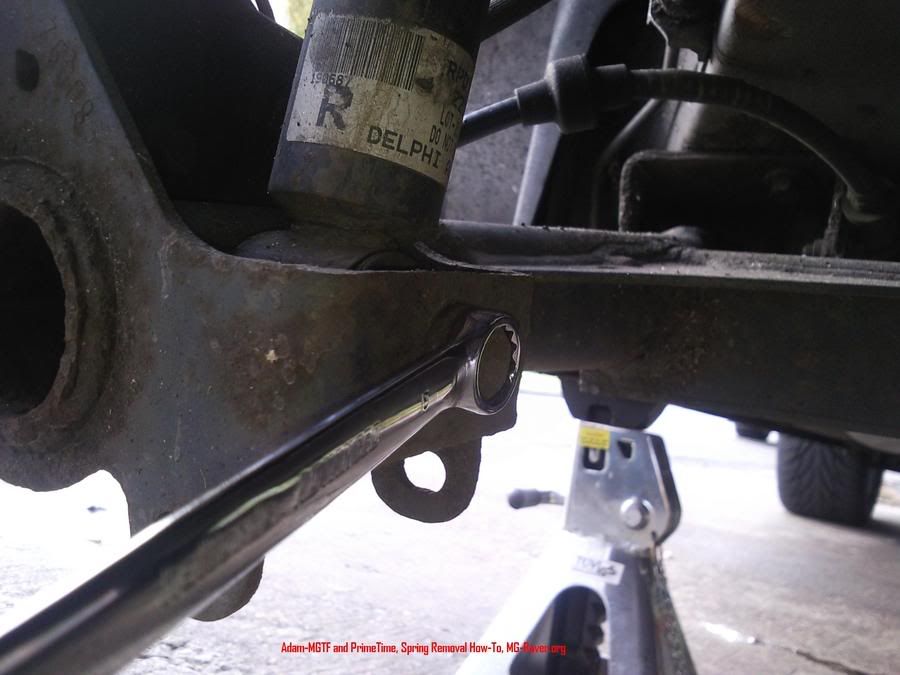
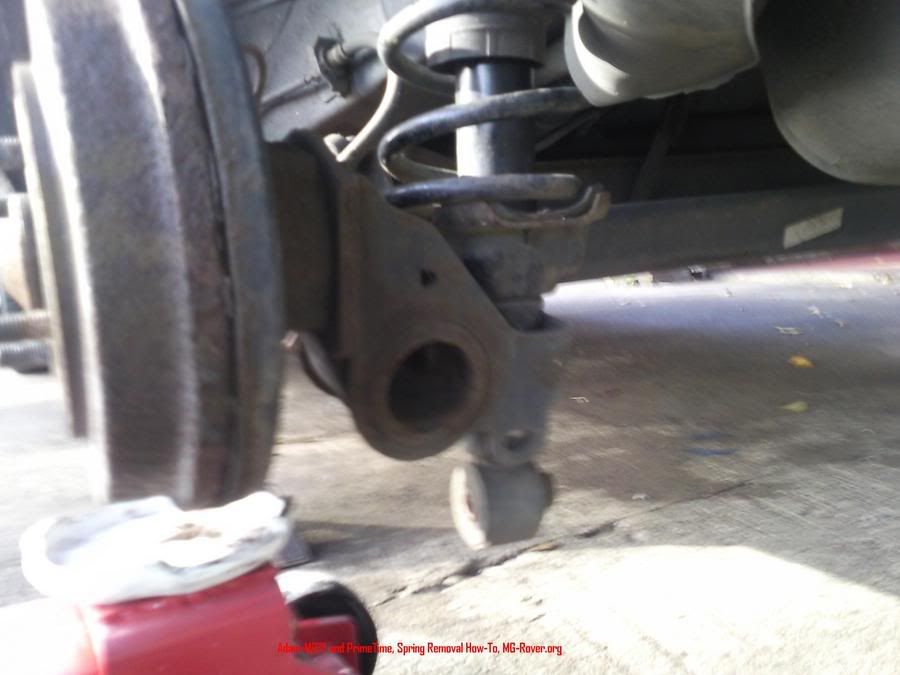
Loosen the bottom pinch bolt but leave it in for now (breaker bar may be needed and plenty of WD40 few hours before doing the job)
![Image]()
![Image]()
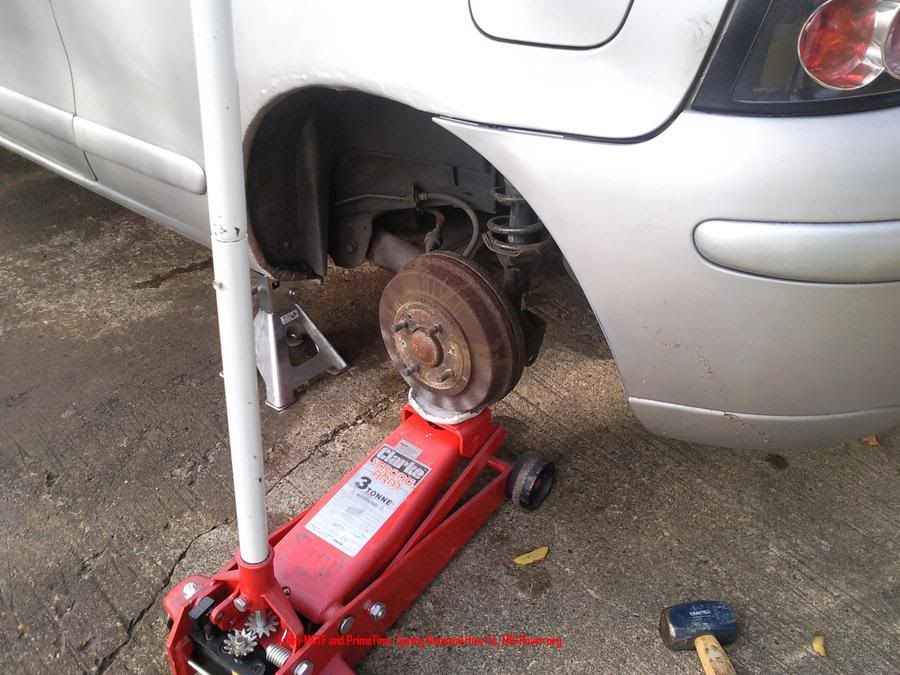
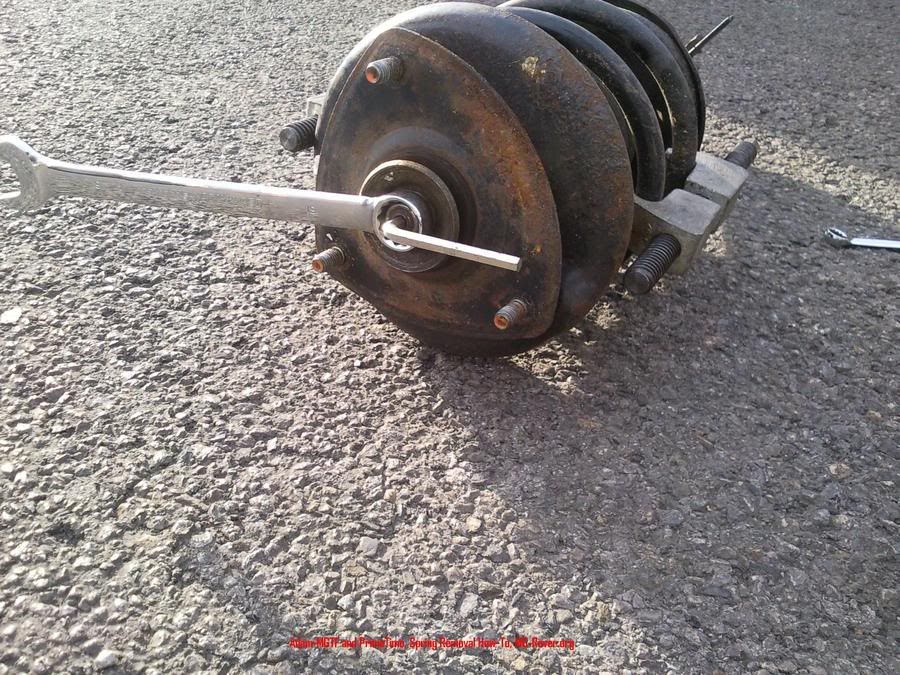
Support the drum with a jack (if you have rear disks place it directly under the strut)
![Image]()
![Image]()
Jack it so that the spring isn’t compressed but you can still gain access to the nylon nut.
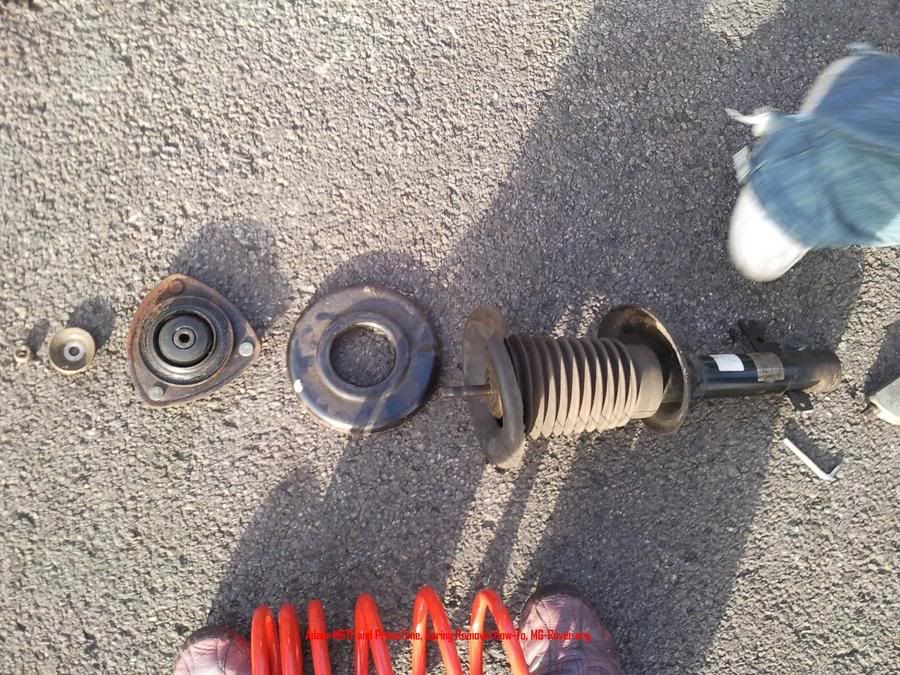
Now to save putting spring clams, as this takes longer, remove the two securing screws and the nylon nut .
Gently lower the jack and the top cup should pop of (make sure to collect all the bits and remember the order in which they are positioned)
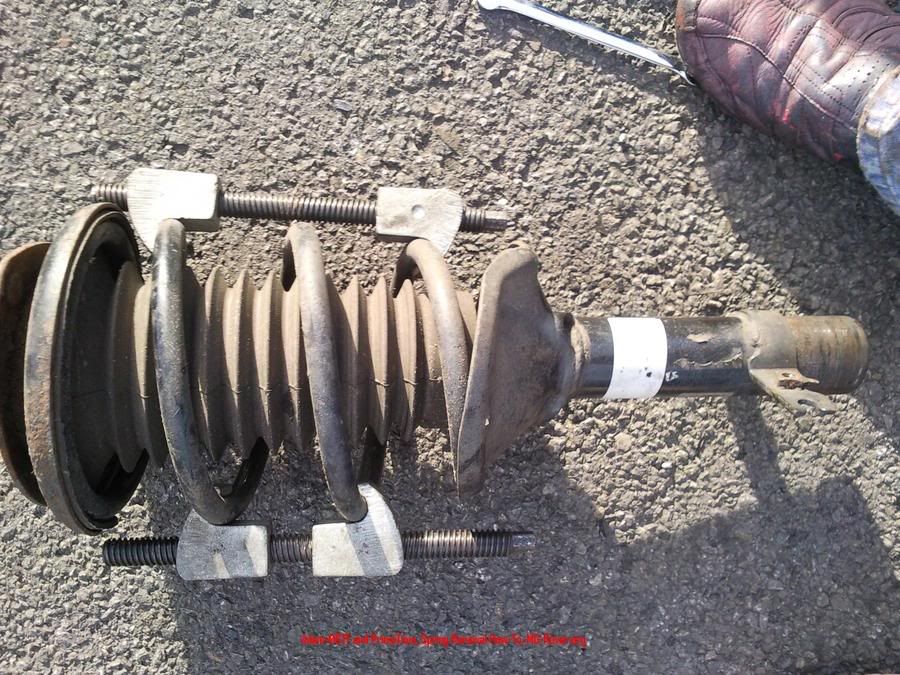
Remove the bottom pinch bolt and take the strut out.
![Image]()
![Image]()
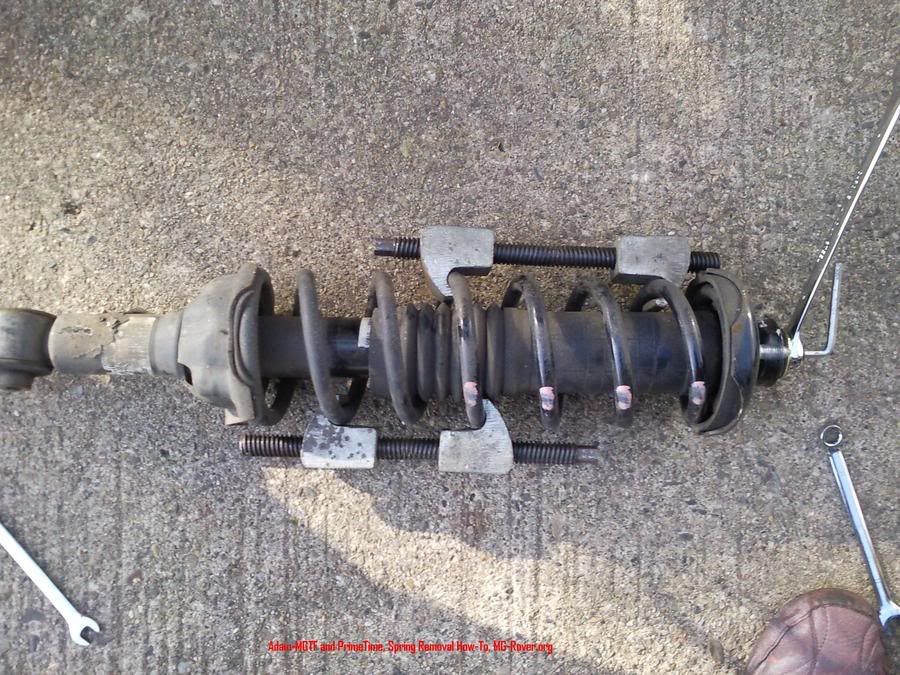
Now take the old spring off and place the new springs on.
![Image]()
Get a good grip with the spring clamps and tighten them until the top bolt can be accessed.
![Image]()
![Image]()
Put the top rubber plug and cup back on as well as the metal washer and nylon nut (you should ideally get new nylon nuts, and make sure the springs are fited correctly, they have a certain position within the strut)
The clamps can come of if they get in they way, but id recommend leaving them in, if not like I said make sure the nylon nut has enough thread to be secure
Now you need to reposition the strut back in
![Image]()
and put the pinch bolt in raise the hub and get the two top securing screws in and tighten the nylon nut.
Remove clamps if you haven’t done so , tighten pinch bolt and make sure the other bolts are tight.
Put your wheels on and TIGHTEN them
Lower the car, put the rubber grommet back in place over the securing screws in the boot, and carpet back in.
Fronts
Again loosen wheel nuts, jack car up and support on AXLE STANDS
Remove wheels
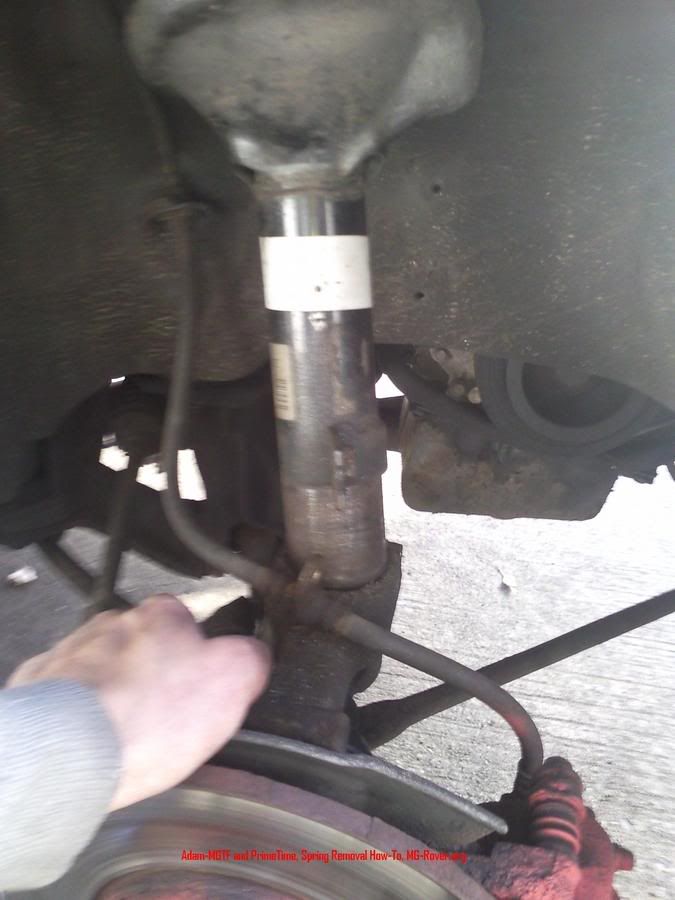
Remove the brake line securing bolt using a spanner (this is so that you can remove the strut)
![Image]()
![Image]()
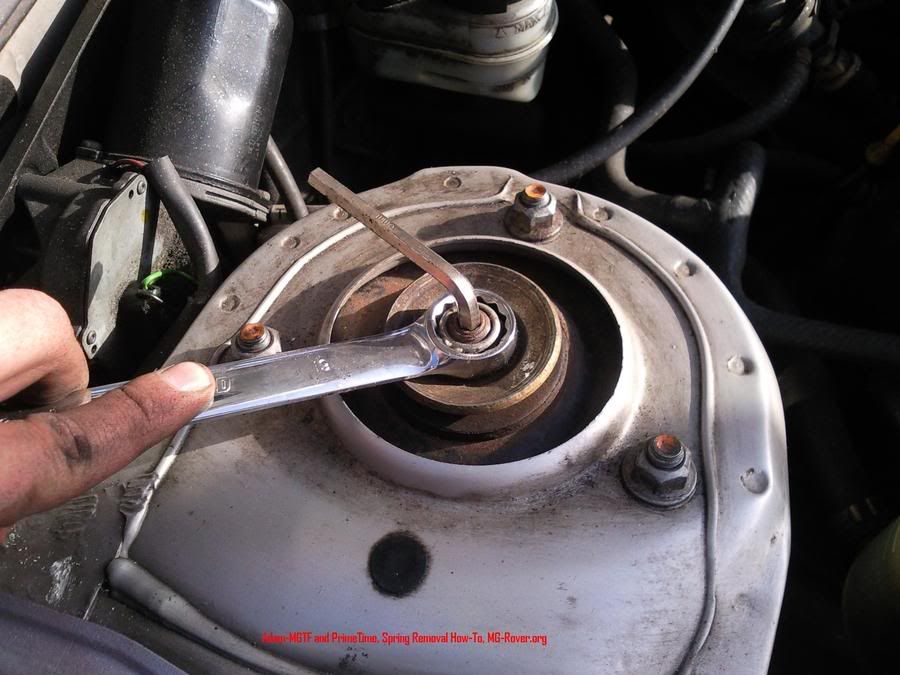
Open the bonnet and again loosen the nylon nut (one or two rotations)
![Image]()
![Image]()
Loosen the three securing nuts at the top of the hub, but leave them in (makes it easier to remove the bottom pinch bolt)
Remove the bottom pinch bolt, again breaker bar and WD40
![Image]()
![Image]()
Remove the top securing nuts
Take the strut out and get spring clamps on the spring, try and get a good grip with them so you can take as much pressure of the spring as possible.
![Image]()
![Image]()
Remove nylon nut
![Image]()
Evenly undo the spring clamps until they come of the spring.
![Image]()
![Image]()
Old springs off, new ones on and tighten them with clamps until you can get the top cups etc. and nylon nut on (Clamps again preferably stay on)
Position strut back in and get the pinch bolt and top securing struts on.
Tighten the nylon nut
![Image]()
Tighten the top nuts and pinch bolt
Put your brake line screw back on.
Remove clamps if you haven’t already done so
Get you wheels on, jack car, remove axle stands and lower car
It’s a good idea to do one side at a time and remember when reassembling the strut you can look at the other side and MAKE SURE it’s the same
Go for a drive and take it easy, listen for any clunking.
Enjoy much better looks and handling and a well deserved break. I would give 4hours for this job if you haven’t attempted it before
If I missed something, someone point it out and Ill correct it. Apologies if so, but wrote this guide the other day and then computer crashed when uploading it Arghh!!!!:cus:
UPDATE, HOPE THE PICS CORRESPOND!!!!!
How to put lowering springs on a Bubble/25/ZR
If you wish to follow my guide I will not be held responsible if anything was to happen.....and please ensure you have the right tools and are confident in doing this work, the most dangerous part is the spring itself, when compressed it has serious force and can injure if it comes free when released.
Tools needed
Jack
Axle Stands
Ratchet/Spanner (12mm, 15mm)
Allen Keys
Spring Compressors
WD40 and a Breaker Bar can be useful
Starting with the rear
Jack the car up support on AXLE STANDS and remove the wheels
Open the boot and remove the carpet
You should see this,
Remove the rubber grommet to reveal the top of the strut hub
Loosen the Nylon Nut using an Allen Key and Spanner (two or three rotations)
Loosen the top nuts using a ratchet
Loosen the bottom pinch bolt but leave it in for now (breaker bar may be needed and plenty of WD40 few hours before doing the job)
Support the drum with a jack (if you have rear disks place it directly under the strut)
Jack it so that the spring isn’t compressed but you can still gain access to the nylon nut.
Now to save putting spring clams, as this takes longer, remove the two securing screws and the nylon nut .
Gently lower the jack and the top cup should pop of (make sure to collect all the bits and remember the order in which they are positioned)
Remove the bottom pinch bolt and take the strut out.
Now take the old spring off and place the new springs on.
Get a good grip with the spring clamps and tighten them until the top bolt can be accessed.
Put the top rubber plug and cup back on as well as the metal washer and nylon nut (you should ideally get new nylon nuts, and make sure the springs are fited correctly, they have a certain position within the strut)
The clamps can come of if they get in they way, but id recommend leaving them in, if not like I said make sure the nylon nut has enough thread to be secure
Now you need to reposition the strut back in
and put the pinch bolt in raise the hub and get the two top securing screws in and tighten the nylon nut.
Remove clamps if you haven’t done so , tighten pinch bolt and make sure the other bolts are tight.
Put your wheels on and TIGHTEN them
Lower the car, put the rubber grommet back in place over the securing screws in the boot, and carpet back in.
Fronts
Again loosen wheel nuts, jack car up and support on AXLE STANDS
Remove wheels
Remove the brake line securing bolt using a spanner (this is so that you can remove the strut)
Open the bonnet and again loosen the nylon nut (one or two rotations)
Loosen the three securing nuts at the top of the hub, but leave them in (makes it easier to remove the bottom pinch bolt)
Remove the bottom pinch bolt, again breaker bar and WD40
Remove the top securing nuts
Take the strut out and get spring clamps on the spring, try and get a good grip with them so you can take as much pressure of the spring as possible.
Remove nylon nut
Evenly undo the spring clamps until they come of the spring.
Old springs off, new ones on and tighten them with clamps until you can get the top cups etc. and nylon nut on (Clamps again preferably stay on)
Position strut back in and get the pinch bolt and top securing struts on.
Tighten the nylon nut
Tighten the top nuts and pinch bolt
Put your brake line screw back on.
Remove clamps if you haven’t already done so
Get you wheels on, jack car, remove axle stands and lower car
It’s a good idea to do one side at a time and remember when reassembling the strut you can look at the other side and MAKE SURE it’s the same
Go for a drive and take it easy, listen for any clunking.
Enjoy much better looks and handling and a well deserved break. I would give 4hours for this job if you haven’t attempted it before
If I missed something, someone point it out and Ill correct it. Apologies if so, but wrote this guide the other day and then computer crashed when uploading it Arghh!!!!:cus:
UPDATE, HOPE THE PICS CORRESPOND!!!!!


")


